
This tutorial is perfect for another way to keep and show off a sentimental shirt, an unusable-as-a-shirt shirt, or a random fantastic thrift store find... plus they generally already have pockets!
 I have a drawerfull of mens' shirts that my mother-in-law gave me, probably almost a year ago, to make into several tote bags for her. The shirts belonged to three very important men: her deceased husband (Kyle) , her deceased father (George), and her deceased father-in-law (Dick). Wow, these shirts are heavy. I kept pushing them off and pushing them off and then I actually got REALLY busy. The other day she reminded Jace to ask me about them because she really had intended to give one of them to her husband's mother (Mary Ellen) using 1 shirt that had belonged to Dick (her husband) and 1 that belonged to Kyle (her son). I didn't know that part of the story... so I got to work.
Material:
- two medium/large/xl mens' (or women's, if they're big enough) shirts. Woven is best, I suppose knit is possible but the bag would not be as structured and it might lose its shape.
- iron/ironing board
- cutting mat (as large as possible), rotary cutter
- OR just use:
- scissors
- straight edge ruler (preferably see-through)
- fabric marker or chalk
- coordinating thread
- Optional: interfacing ***(I didn't use any)***
Step 1
Iron! - which coincidentally is something my mother-in-law absolutely adores.
 I am not a perfect homemaker. I don't know if I've ever actually ironed any of Jace's shirts. Just do your best. Try to make it lie flat, including if there are any pleats on the front or back. Pleats can be tricky.
Step 2
Cutting
Cut along one side of the seam and continue going in a straight line through the sleeve. Cut an inch or two up from the shoulder seam and around behind the collar.


Sew up the front piece
About 1/8" away from the edge of the shirt front that has the button holes, or you can follow the original topstitching. It is also helpful to use a zipper foot (not pictured) on this part to ease around the buttons. I like to use a longer stitch here to emulate the topstitch effect that is already present.

Step 4
Measure and cut some more
I had originally planned to make my bag 14.5" across and 14.5" tall (I actually had to make it wider to accommodate the pocket because I wanted to make sure I got all of the original pocket onto the bag, so it became about 15.5"W). Plot out the size you want. Use your straightedge and fabric marker to draw a straight line across where you'd like the top of the bag (I didn't do this, though I should've... I went ahead and cut it, but it caused me problems later) . You can even include a bit of the lapels if you want to get creative/challenging. Mark down the desired length from the straight line at several intervals, then connect your dots using your straightedge to create the bottom line and then connect the top and bottom lines at the edges to make the sides. Make sure that the center of the bag is where you want it. I marked my center at 7.25 since I had intended to make the bag 14.5" across. Also, make sure that you don't cut too close to the buttons, as it makes it difficult to sew around.
 Then cut! If you're using scissors, just cut along the lines you've drawn. Or use your straightedge with your rotary cutter.
Step 5
The back side
You could repeat step 4 and measure out, but I find it simpler to use the piece cut from step 4 as a template to cut the rest of the pieces (as long as you are careful). The back of the shirt can be tricky if it has pleats. Make sure it's ironed well, you may even want to pin them down if they are large enough. Do not pull the pleats, lay the template down- checking to make sure the placement is correct, place the straightedge on top of both and carefully cut along the edges. Or once you've laid the template down you can trace it with the marker and cut with scissors.

Step 6
Sew the front & back together (note: if you are going to attach interfacing, right before this is the step in which you would)
Pin the front & back pieces "right sides" together and sew, leaving the top open. I use about 3/8" seam allowance. You can use any measurement you want, as long as you do the same throughout. I included this picture to show that on the red shirt, I had to pin down the pleat on the back because it was particularly large and the fold ran the entire length. (Important: On one of the bag bodies (on mine I chose the red), leave about 5" unsewn on one of the sides - away from the corners - to turn it right side out at the end)

Step 7 (Note: this step is optional. it creates a type of flat bottom effect. You can eliminate it if you'd rather the bag be simpler and have squared off corners. See second to last photo in this step for a better idea of what I'm talking about)
Flat bottomed corners
Measure a two inch square on all four corners (two on front & two on back) of the bag body that you just sewed together. Mark it with fabric marker. The fabric marker didn't show up well on the red fabric for me, so I ended up marking it with small straight pins.

Pinch the corner of the bag body so that what was the top corners in the squares you drew line up. Pin & sew along that line.


Cut about 3/8" from the sewing line.


When you flip it right-side out, it should look like this. If you haven't already, complete steps 1-7 in your other shirt.
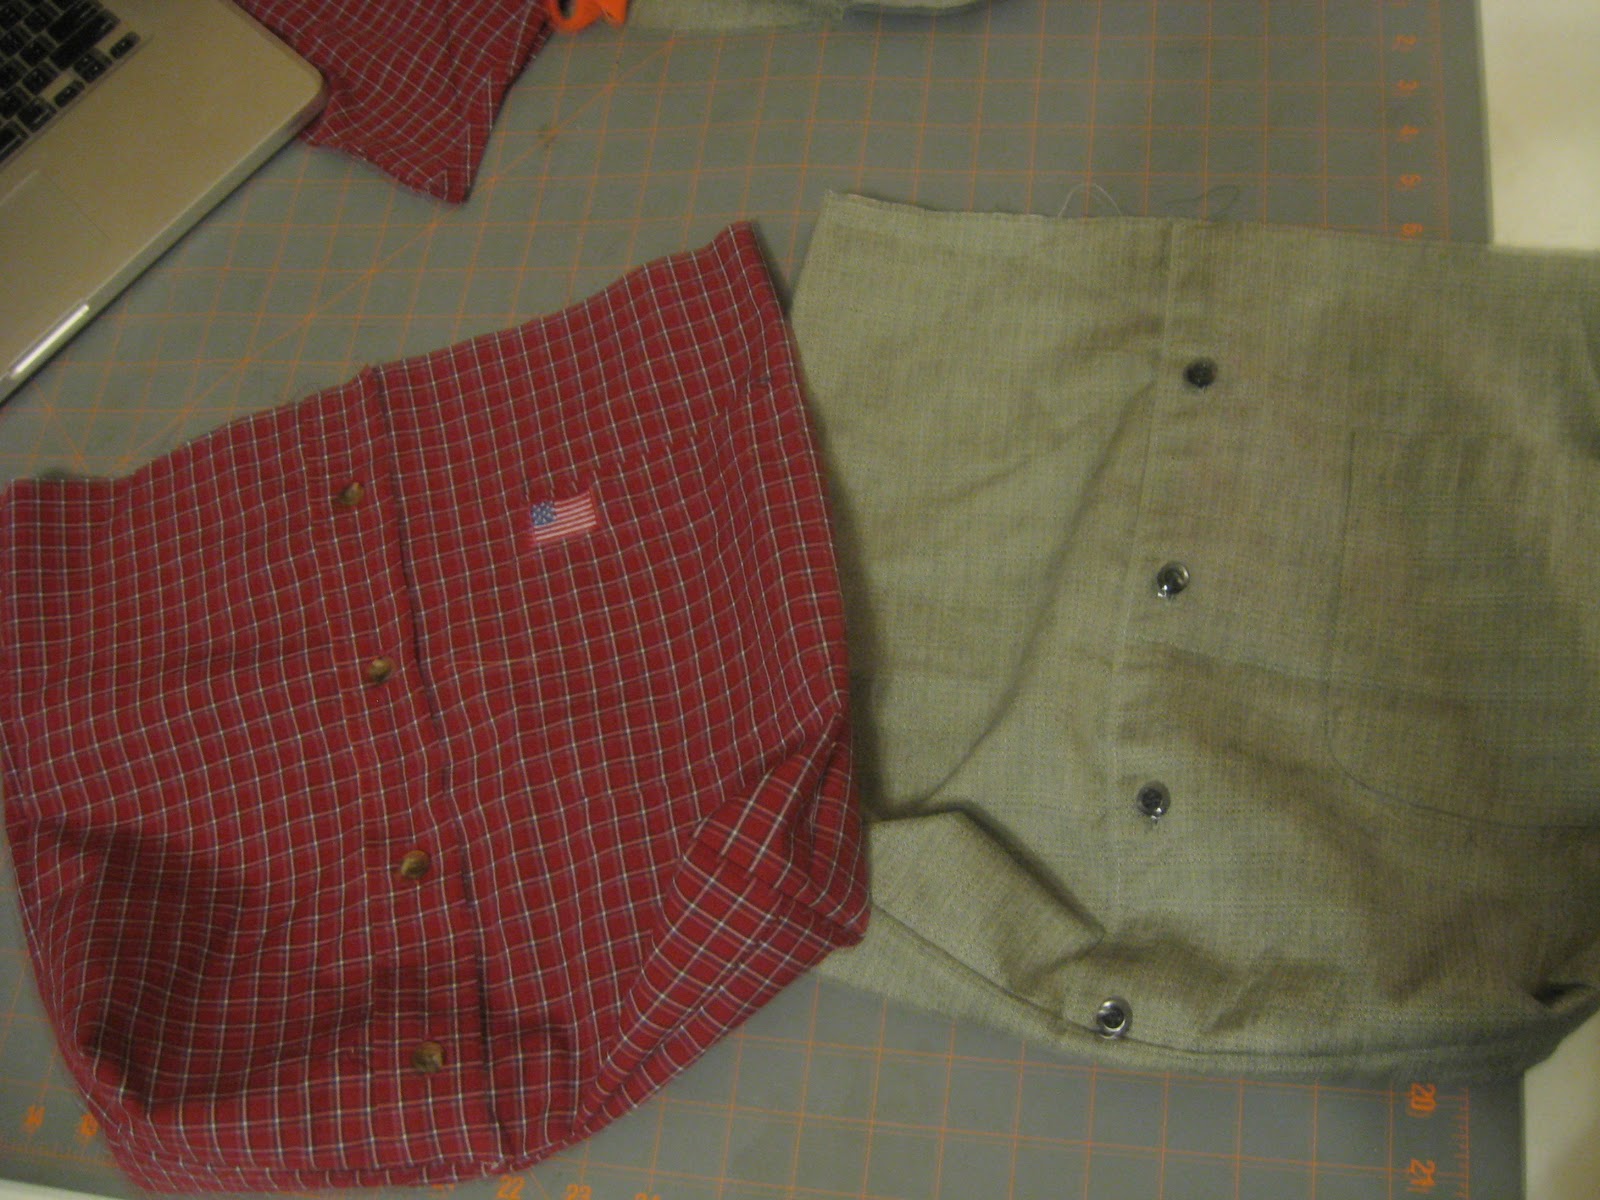
The two bag body pieces before assembly
Step 8
Cut straps
I had enough fabric left in my shirts to use them to cut my straps. I chose them to be 2.5" x 17.5" - cut two in each color (or four total if you're only using one color)


Step 9
Sew straps
Pin one of each right sides facing and sew along both long sides and one short side.


Iron the straps and topstitch 1/8" from edge.


Step 10
Putting it all together!
Place one of the bag bodies inside the other, making sure that the right sides are touching each other. Place the straps in-between the two pieces. Measure out the middle of the bag and then out one or two inches on each side to place the straps. Make sure that both sides of the bag have even placement of the straps. You will not see the straps as you are sewing because they are sandwiched inside the bag bodies.


Sew all the way around the top of the bag, again 3/8" or 1/2" from the raw edge. You may want to stitch several times over where the straps are. Turn the bag right-side out through the hole that you left open.

You may or may not need to iron around the edge. Then TOPSTITCH! almost done........

Step 11
Ladder stitch the hole that was left open by hand.
Make sure to knot it well on both ends, use coordinating thread.

You're done! Tote your tote, show off your sentimentality and/or eco-consciousness and fantastic skills!
Love it!
ReplyDelete